Tuesday, August 27, 2024


The Adirondack chair, with its iconic slanted seat and wide armrests, is a classic piece of outdoor furniture that adds charm to any garden or patio. Building one yourself can be a rewarding project, combining woodworking skills with the satisfaction of creating something beautiful and functional. In this guide, we'll walk you through the process of making your own Adirondack chair, from gathering materials to the final touches.

Materials and Tools You'll Need

Before starting, ensure you have all the necessary materials and tools:

Materials:

  • 2x4 lumber (cedar or pine is recommended)
  • 1x4 lumber
  • Exterior wood screws (1.5" and 2.5")
  • Wood glue
  • Sandpaper (80 and 120 grit)
  • Wood filler (optional)
  • Exterior wood finish or paint

Tools:

  • Miter saw or circular saw
  • Drill with a countersink bit
  • Jigsaw
  • Measuring tape
  • Carpenter's square
  • Clamps
  • Paintbrushes or sprayer

Step 1: Cut the Wood Pieces

Start by cutting the wood into the necessary pieces. Here are the basic dimensions:

  • Front Legs: Two pieces of 1x4 lumber, each 21 inches long.
  • Back Legs/Seat Supports: Two pieces of 2x4 lumber, each 36 inches long, cut at a 15-degree angle at one end.
  • Armrests: Two pieces of 1x4 lumber, each 31 inches long.
  • Seat Slats: Five pieces of 1x4 lumber, each 22 inches long.
  • Back Slats: Seven pieces of 1x4 lumber, each 32 inches long, with the top ends cut to form a slight arch.
  • Crosspieces: Two pieces of 1x4 lumber, each 23 inches long (for the back support) and one piece 1x4 lumber, 20 inches long (for the front apron).

Ensure all cuts are smooth and accurate to make assembly easier.

Step 2: Assemble the Chair Frame

Start with the back legs and seat supports:

  1. Attach the Front Legs to the Seat Supports: Position the front legs flush with the front edge of the seat supports. Drill pilot holes, apply wood glue, and secure them with 2.5" screws.
  2. Attach the Rear Crosspiece: Place the 23-inch crosspiece between the back legs at the desired height for the seat. Drill pilot holes and secure it with 2.5" screws.

Step 3: Add the Seat Slats

  1. Position the Slats: Lay the seat slats across the seat supports. Start with the slat closest to the front legs, leaving about a 1/4-inch gap between each slat.
  2. Secure the Slats: Drill pilot holes, countersink them, and secure the slats with 1.5" screws.

Step 4: Build and Attach the Backrest

  1. Attach the Back Slats: Lay out the back slats on a flat surface, arranging them in the desired order. Attach the remaining 23-inch crosspiece across the back slats, about 5 inches from the top. Use 1.5" screws to secure each slat.
  2. Secure the Backrest to the Frame: Position the assembled backrest against the rear legs. Drill pilot holes, and attach it to the chair frame using 2.5" screws.

Step 5: Attach the Armrests

  1. Position the Armrests: Lay the armrests flat on top of the front legs and the backrest.
  2. Secure the Armrests: Drill pilot holes, countersink them, and secure the armrests with 2.5" screws. Add additional screws at the backrest if needed.

Step 6: Sanding and Finishing

  1. Sand the Chair: Smooth all surfaces with 80-grit sandpaper, then finish with 120-grit sandpaper to remove any rough edges or splinters.
  2. Apply Finish: Choose a wood stain, paint, or clear finish suitable for outdoor use. Apply evenly with a brush or sprayer. Allow each coat to dry completely before applying the next.

Step 7: Final Touches

Check all screws and joints to ensure they are secure. Add wood filler to any gaps or holes if desired, then sand and touch up with paint or finish.

Conclusion

Building an Adirondack chair is a fun and fulfilling woodworking project that results in a comfortable and stylish piece of furniture for your outdoor space. With a little time and effort, you can create a durable chair that you'll enjoy for years to come. Whether you're a seasoned DIY enthusiast or a beginner looking for a challenge, this project offers a great opportunity to improve your skills and add a personal touch to your garden or patio.
Read More..
  Adirondack Chair Making

When it comes to outdoor relaxation, nothing beats the comfort and style of well-designed deck lounge chairs. Whether you're sipping your morning coffee, soaking up the sun, or enjoying a sunset with a good book, the right chair can elevate your outdoor experience. In this article, we'll explore some creative deck lounge chair ideas and delve into the process of making your own Adirondack chair—a timeless classic that embodies both comfort and craftsmanship.

Deck Lounge Chair Ideas

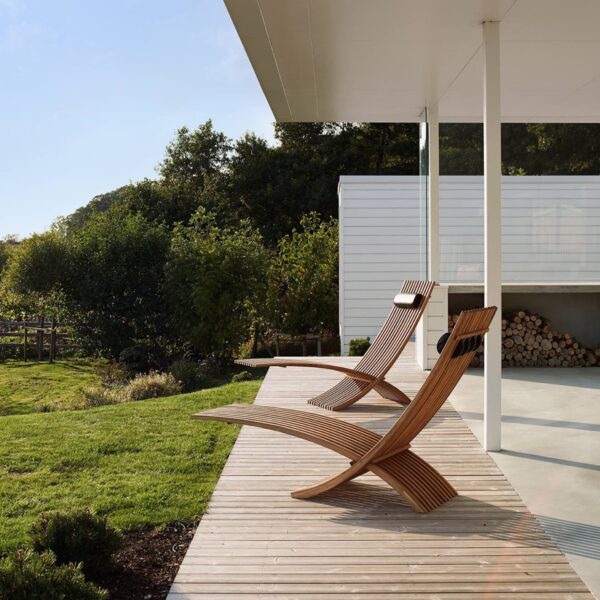
  1. Modern Minimalist Design

    • Style: Clean lines, neutral colors, and simple forms define the modern minimalist lounge chair. This style is perfect for those who prefer a sleek and uncluttered outdoor space.
    • Materials: Opt for materials like aluminum, teak, or weather-resistant wicker paired with cushions in neutral tones like gray, beige, or white.
    • Features: Look for adjustable backrests and foldable designs for added functionality.
  2. Rustic Wooden Lounge Chairs

    • Style: Embrace the natural beauty of wood with rustic lounge chairs. These chairs bring warmth and a touch of countryside charm to your deck.
    • Materials: Cedar, teak, or pine are popular choices for their durability and weather resistance. Consider using reclaimed wood for an eco-friendly option.
    • Features: Enhance comfort with thick cushions and throw blankets. Choose designs with wide armrests and sturdy frames.
  3. Hammock-Style Lounge Chairs

    • Style: For ultimate relaxation, hammock-style lounge chairs are a fantastic choice. They create a laid-back vibe and are perfect for lazy afternoons.
    • Materials: Strong, weather-resistant fabrics like Sunbrella are ideal for these chairs, combined with a sturdy steel or wooden frame.
    • Features: Some designs offer built-in sunshades or cup holders for added convenience.
  4. Convertible Chaise Lounges

    • Style: Versatile and functional, convertible chaise lounges can transition from a flat lounger to a sitting chair with ease.
    • Materials: Aluminum or steel frames with mesh fabric for breathability. Some designs also incorporate wood accents for added warmth.
    • Features: Look for models with wheels for easy mobility and adjustable headrests.
  5. Adirondack Loungers

    • Style: Combining the classic look of Adirondack chairs with the comfort of a lounge chair, these pieces are both stylish and ergonomic.
    • Materials: Traditionally made from wood, but modern versions also come in durable plastic or composite materials.
    • Features: Contoured seats, wide armrests, and an angled back for comfort. Some designs include footrests for full-body relaxation.

Adirondack Chair Making: A Step-by-Step Guide

Crafting your own Adirondack chair can be a rewarding project, giving you a functional and stylish piece for your outdoor space. Here's a step-by-step guide to help you get started.

  1. Gather Materials and Tools

    • Materials: Choose a durable wood like cedar, pine, or teak. You'll need planks for the back, seat, arms, legs, and supports.
    • Tools: Basic woodworking tools such as a saw, drill, measuring tape, clamps, sandpaper, and a screwdriver are essential. You'll also need wood screws, wood glue, and a finish like paint or varnish.
  2. Plan and Measure

    • Start by finding a reliable blueprint or plan for an Adirondack chair. These can often be found online or in woodworking books.
    • Measure and cut your wood according to the plan. Accuracy is key, so take your time to ensure all pieces are cut to the correct dimensions.
  3. Construct the Frame

    • Begin by assembling the legs and supports. Attach the front legs to the seat supports, making sure they are level and sturdy.
    • Next, attach the back legs and the rear support piece. This will form the basic frame of your chair.
  4. Attach the Seat and Back Slats

    • Secure the seat slats to the frame, spacing them evenly. Use screws and wood glue for a strong hold.
    • Attach the back slats, starting from the bottom and working your way up. Make sure they are evenly spaced and angled for comfort.
  5. Add the Armrests and Finishing Touches

    • Attach the armrests to the top of the front legs and back supports. These should be wide enough to comfortably rest your arms or even hold a drink.
    • Sand the entire chair to smooth out any rough edges or splinters. Apply your chosen finish to protect the wood and enhance its appearance.
  6. Final Assembly and Testing

    • Ensure all screws and joints are tight and secure. Give your chair a good shake to test its stability.
    • Once you're satisfied, place the chair in your desired location, sit back, and enjoy the fruits of your labor!

Conclusion

Whether you choose to buy a stylish deck lounge chair or take on the project of making your own Adirondack chair, the result is the same: a comfortable and inviting outdoor space perfect for relaxation. With these ideas and tips, you're well on your way to creating the perfect retreat right in your backyard. Happy lounging!


Read More..